- www.mautic.org
- GitHub – mautic/mautic: Mautic: Open Source Marketing Automation Software.
- Install Mautic Self-Hosted Email Marketing on Ubuntu 20.04 (linuxbabe.com)
ก่อนติดตั้ง Mautic ต้องมี
- Apache2
- Mysql
Step 1: Download Mautic onto Your Ubuntu 20.04 Server
ดู release ของ Mautic ที่ github.com/mautic/mautic/releases/
Download the latest stable version by executing the following command on your server.
wget https://github.com/mautic/mautic/releases/download/4.2.1/4.2.1-update.zip
wget https://github.com/mautic/mautic/releases/download/4.4.7/4.4.7-update.zip
Install the unzip utility and unzip it to /var/www/mautic/ directory.
sudo apt install unzip

sudo mkdir -p /var/www/mautic/

sudo unzip 4.4.7-update.zip -d /var/www/mautic/
Then make the web server user (www-data) as the owner of this directory.
sudo chown -R www-data:www-data /var/www/mautic/
Step 2: Create a MariaDB Database and User for Mautic
Log in to MariaDB console.
sudo mysql
Next, create a new database for Mautic using the following command. This tutorial names it mautic, you can use whatever name you like for the database.
CREATE DATABASE mautic DEFAULT CHARACTER SET utf8 COLLATE utf8_unicode_ci;
จะมี warning ประมาณนี้
CREATE DATABASE mautic DEFAULT CHARACTER SET utf8 COLLATE utf8_unicode_ci	1 row(s) affected, 2 warning(s):
 3719 'utf8' is currently an alias for the character set UTF8MB3, but will be an alias for UTF8MB4 in a future release. Please consider using UTF8MB4 in order to be unambiguous.
 3778 'utf8mb3_unicode_ci' is a collation of the deprecated character set UTF8MB3. Please consider using UTF8MB4 with an appropriate collation instead.
ให้เปลี่ยนเป็นใช้คำสั่งนี้แทน
CREATE DATABASE mautic DEFAULT CHARACTER SET UTF8MB4 COLLATE utf8mb4_unicode_ci;
The following command will create a database user and password, and at the same time grant all permission of the new database to the new user so later on Mautic can write to the database. Replace red texts with your preferred database name, username and password.
CREATE USER 'jack'@'localhost' IDENTIFIED BY 'password';
GRANT ALL ON mautic.* TO 'jack'@'localhost' IDENTIFIED BY 'password';
Flush privileges table and exit MariaDB console.
FLUSH PRIVILEGES;

EXIT;
Step 3: Install Required and Recommended PHP Modules.
Run the following command to install PHP modules required or recommended by Mautic
sudo apt install php-imagick php7.4-fpm php7.4-mysql php7.4-common php7.4-gd php7.4-imap php7.4-imap php7.4-json php7.4-curl php7.4-zip php7.4-xml php7.4-mbstring php7.4-bz2 php7.4-intl php7.4-gmp
เราใช้ PHP-FPM แทน PHP – PHP: FastCGI Process Manager (FPM) – Manual
If you use Apache web server, then you need to disable the PHP module for Apache.
sudo a2dismod php7.4
You also need to disable the prefork MPM module in Apache.
sudo a2dismod mpm_prefork
Now you need to run the following command to enable three modules in order to use PHP-FPM in Apache, regardless of whether mod_php is installed on your server.
sudo a2enmod mpm_event proxy_fcgi setenvif
Then restart Apache.
sudo systemctl restart apache2
Step 4: Create Apache Virtual Host for Mautic
If you use Apache web server, create a virtual host for Mautic.
sudo nano /etc/apache2/sites-available/mautic.conf
Put the following text into the file. Replace mautic.example.com with your real domain name and don’t forget to set DNS A record for it.
<VirtualHost *:80>
  ServerName mautic.example.com
  DocumentRoot /var/www/mautic/

  ErrorLog ${APACHE_LOG_DIR}/error.log
  CustomLog ${APACHE_LOG_DIR}/access.log combined

  <Directory />
    Options FollowSymLinks
    AllowOverride All
  </Directory>

  <Directory /var/www/mautic/>
    Options FollowSymLinks MultiViews
    AllowOverride All
    Order allow,deny
    allow from all
  </Directory>

</VirtualHost>
Save and close the file. Then enable this virtual host with:
sudo a2ensite mautic.conf
enable PHP-FPM – How to Install PHP-FPM with Apache on Ubuntu 20.04 (cloudbooklet.com)
sudo a2enconf php7.4-fpm
สามารถทดสอบ PHP-FPM ได้ด้วย
<?php phpinfo(); ?>
Reload Apache for the changes to take effect.
sudo systemctl reload apache2
แก้ไฟล์ /etc/hosts
sudo nano /etc/hosts
127.0.0.1       localhost
127.0.1.1       jack5.com       jack5
192.168.1.142   mautic.example.com

# The following lines are desirable for IPv6 capable hosts
::1     ip6-localhost ip6-loopback
fe00::0 ip6-localnet
ff00::0 ip6-mcastprefix
ff02::1 ip6-allnodes
ff02::2 ip6-allrouters
ถ้าจะเรียกจาก Windows ให้แก้ไขไฟล์ C:\Windows\System32\drivers\etc\hosts
192.168.1.142        jack5.com
192.168.1.142        mautic.example.com
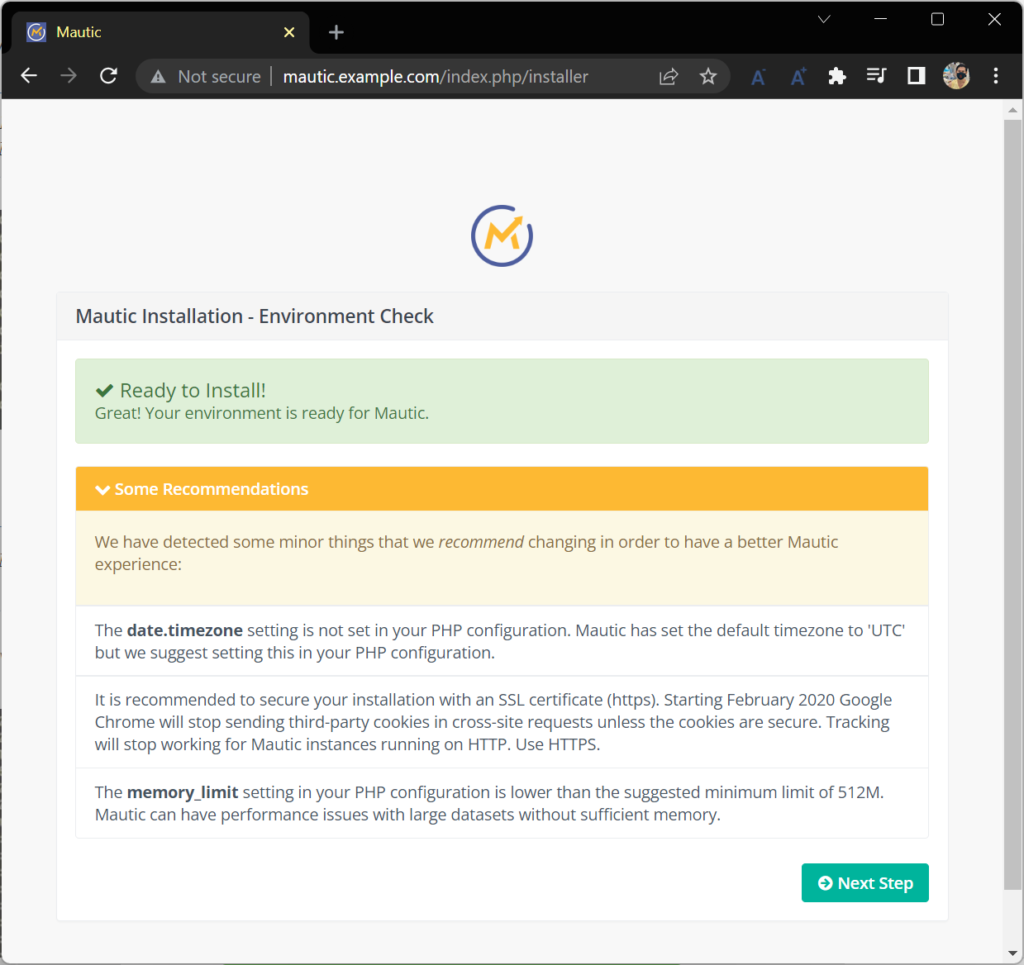
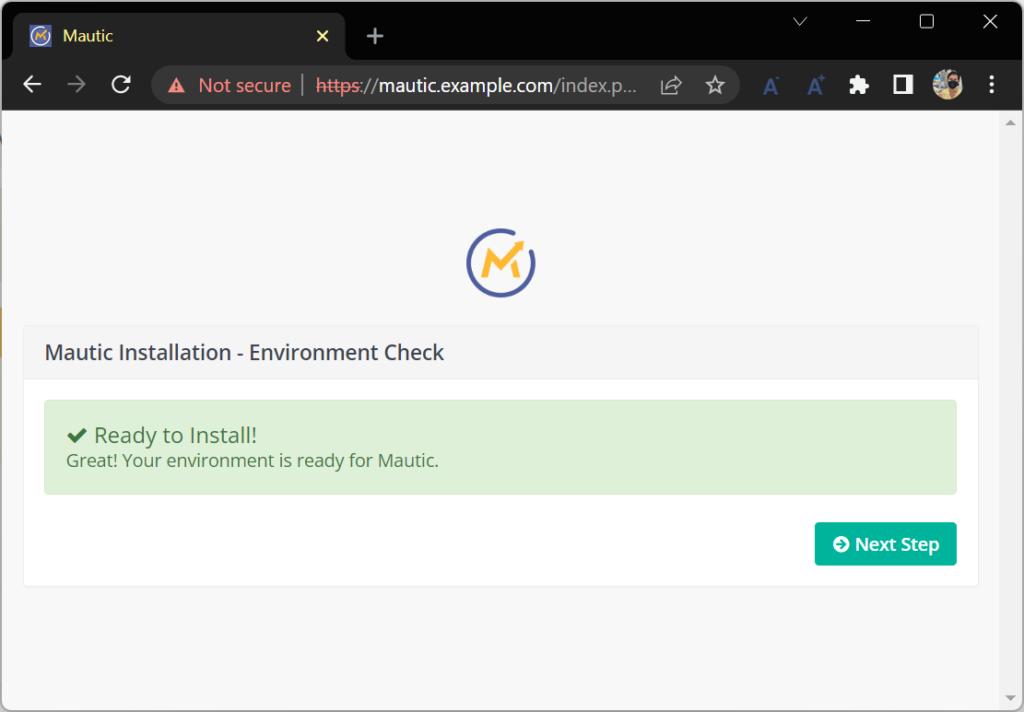
Now you should be able to see the Mautic web-based install wizard at http://mautic.example.com/installer.
แก้ไขไฟล์ php.ini ของ fpm ที่ /etc/php/7.4/fpm/php.ini
(ของ php ที่ /etc/php/7.4/apache2/php.ini ไม่ต้องแก้)
$ sudo nano /etc/php/7.4/fpm/php.ini
date.timezone = Asia/Bangkok
...
memory_limit = 512M
เสร็จแล้ว reload php7.4-fpm
sudo systemctl reload php7.4-fpm
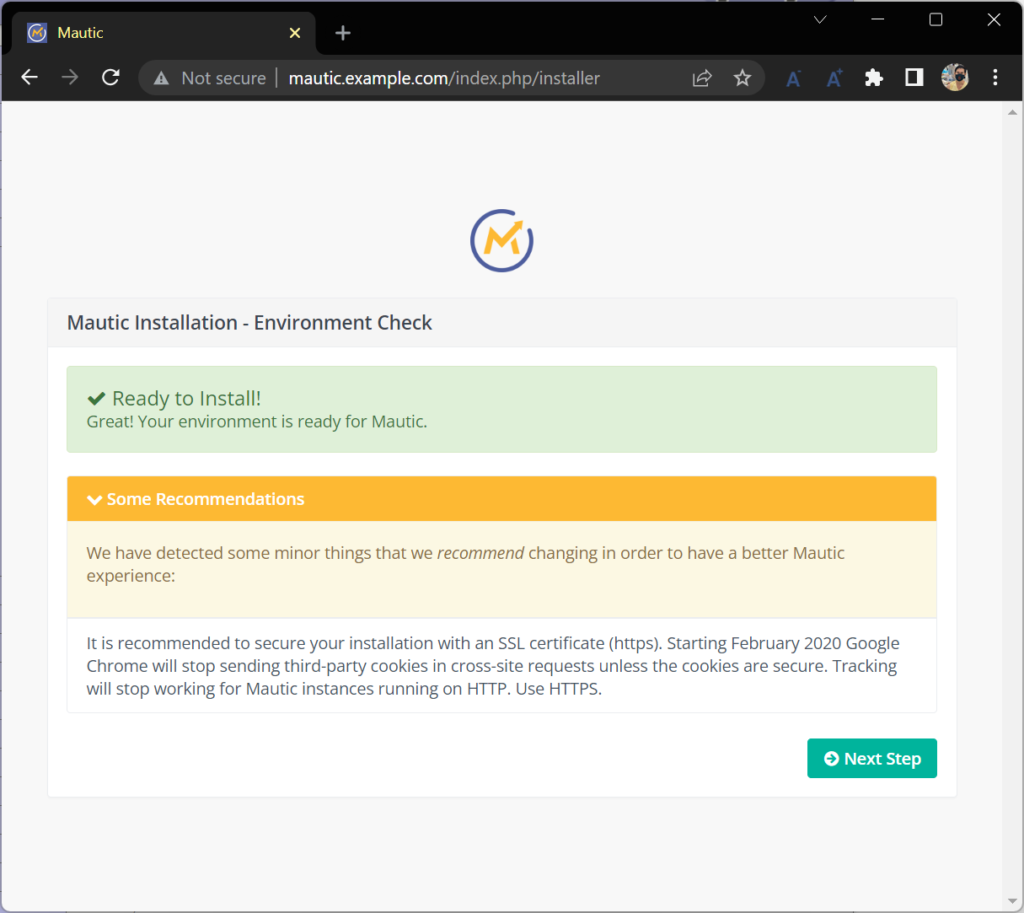
Step 5: Enabling HTTPS
sudo a2enmod ssl
sudo systemctl restart apache2
sudo openssl req -x509 -nodes -days 365 -newkey rsa:2048 -keyout /etc/ssl/private/apache-selfsigned.key -out /etc/ssl/certs/apache-selfsigned.crt
sudo nano /etc/apache2/sites-available/mautic.conf
<VirtualHost *:443>
  ServerName mautic.example.com
  DocumentRoot /var/www/mautic/

  ErrorLog ${APACHE_LOG_DIR}/error.log
  CustomLog ${APACHE_LOG_DIR}/access.log combined

  SSLEngine on
  SSLCertificateFile /etc/ssl/certs/apache-selfsigned.crt
  SSLCertificateKeyFile /etc/ssl/private/apache-selfsigned.key

  <Directory />
    Options FollowSymLinks
    AllowOverride All
  </Directory>

  <Directory /var/www/mautic/>
    Options FollowSymLinks MultiViews
    AllowOverride All
    Order allow,deny
    allow from all
  </Directory>

</VirtualHost>

<VirtualHost *:80>
   ServerName mautic.example.com
   Redirect / https://mautic.example.com
</VirtualHost>
sudo a2ensite mautic.conf
sudo apache2ctl configtest
sudo systemctl reload apache2
Step 6: Finish Mautic Installation in Web Browser
- ใส่ข้อมูลดาต้าเบส
- ใส่ข้อมูล admin
- ใส่ข้อมูล SMTP Server , เราใช้ sendgrid.com แบบ API Key
ติดตั้ง เสร็จแล้ว login ไม่ได้ ฟ้องว่า
Unable to resolve binding type, invalid or unsupported http request

ให้แก้ไขด้วยคำสั่ง – Mautic 3. Can not login for first time – Support / Mautic 3 – Install/Upgrade Support – Mautic Community Forums
sudo a2enmod rewrite
sudo systemctl reload apache2
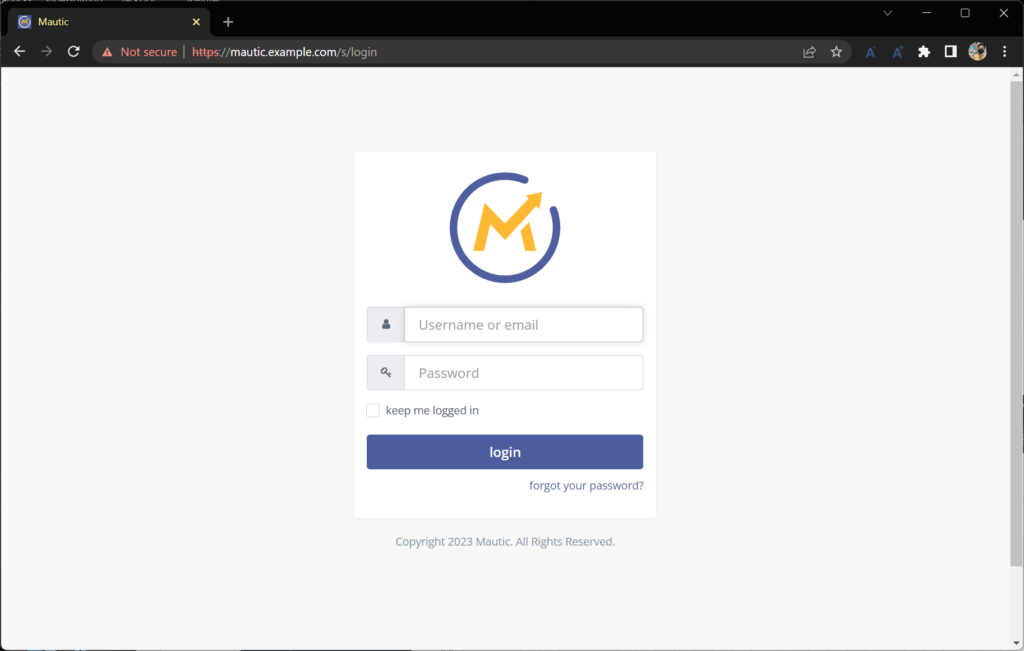
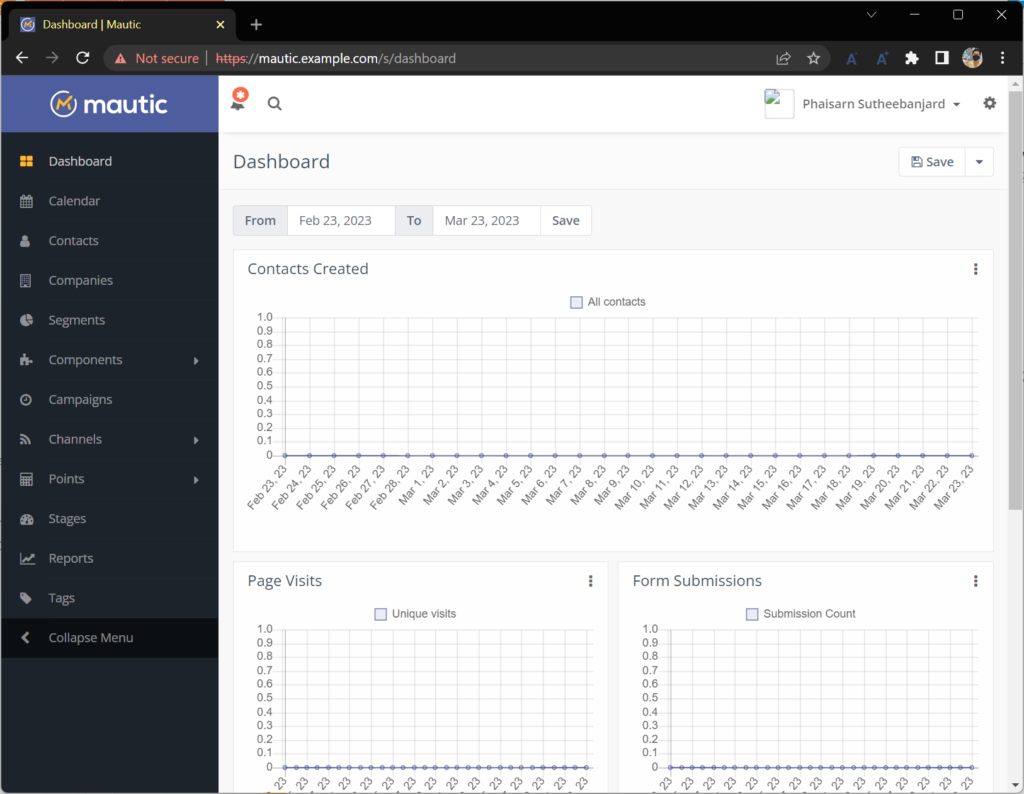
เมื่อ login สำเร็จจะได้หน้านี้