from flask import Flask
from markupsafe import escape
app = Flask(__name__)
@app.route('/')
def index():
return 'Index Page'
@app.route('/hello')
def hello_world():
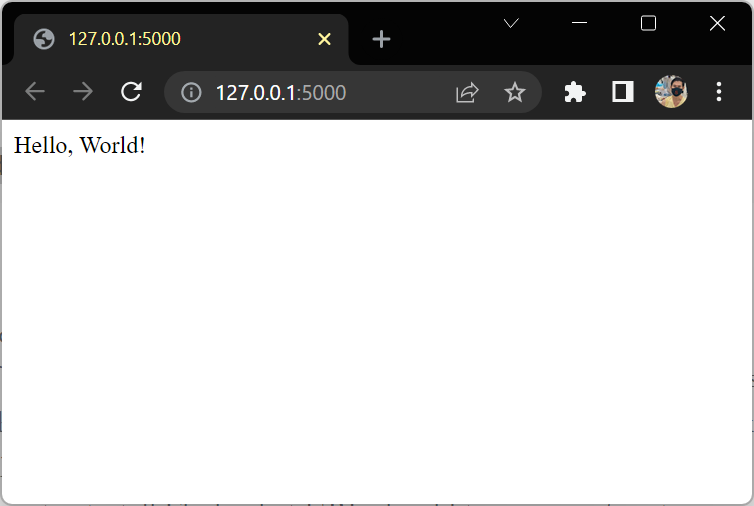
return 'Hello, World'
@app.route("/<name>")
def hello(name):
return f"Hello, {escape(name)}!"
@app.route('/user/<username>')
def show_user_profile(username):
# show the user profile for that user
return f'User {escape(username)}'
@app.route('/post/<int:post_id>')
def show_post(post_id):
# show the post with the given id, the id is an integer
return f'Post {post_id}'
@app.route('/path/<path:subpath>')
def show_subpath(subpath):
# show the subpath after /path/
return f'Subpath {escape(subpath)}'
สร้างโปรเจ็กส์แบบ Windows Forms App (winforms) ชื่อ WinFormsApp1
ดูไฟล์ Program.cs
namespace WinFormsApp1
{
    internal static class Program
    {
        /// <summary>
        ///  The main entry point for the application.
        /// </summary>
        [STAThread]
        static void Main()
        {
            // To customize application configuration such as set high DPI settings or default font,
            // see https://aka.ms/applicationconfiguration.
            ApplicationConfiguration.Initialize();
            Application.Run(new Form1());
        }
    }
}
ดูไฟล์ Form1.cs
namespace WinFormsApp1
{
    public partial class Form1 : Form
    {
        public Form1()
        {
            InitializeComponent();
        }
    }
}
using Microsoft.Extensions.DependencyInjection;
using Microsoft.Extensions.Hosting;
using Microsoft.Extensions.Logging;

namespace WinFormsApp1
{
    internal static class Program
    {
        /// <summary>
        ///  The main entry point for the application.
        /// </summary>
        [STAThread]
        static void Main()
        {
            // To customize application configuration such as set high DPI settings or default font,
            // see https://aka.ms/applicationconfiguration.
            ApplicationConfiguration.Initialize();

            ///Generate Host Builder and Register the Services for DI
            var builder = new HostBuilder()
               .ConfigureServices((hostContext, services) =>
               {
                   //Register all your services here
                   services.AddLogging(configure => configure.AddConsole())
                           .AddScoped<Form1>();
               }).ConfigureLogging(logBuilder =>
               {
                   logBuilder.SetMinimumLevel(LogLevel.Trace);
                   logBuilder.AddLog4Net("log4net.config");
               });

            var host = builder.Build();

            using (var serviceScope = host.Services.CreateScope())
            {
                var services = serviceScope.ServiceProvider;
                try
                {
                    var form1 = services.GetRequiredService<Form1>();
                    Application.Run(form1);

                    Console.WriteLine("Success");
                }
                catch (Exception ex)
                {
                    Console.WriteLine("Error");
                    Console.WriteLine(ex.ToString());
                }
            }
        }
    }
}
แก้ไขไฟล์ Form1.cs
using Microsoft.Extensions.Logging;

namespace WinFormsApp1
{
    public partial class Form1 : Form
    {
        private readonly ILogger _logger;
        public Form1(ILogger<Form1> logger)
        {
            InitializeComponent();
            _logger = logger;

            try
            {
                _logger.LogInformation("Form1 Started");
                MessageBox.Show("Hello World!");
            }
            catch (Exception ex)
            {
                _logger.LogError(ex.Message);
            }
        }
    }
}
%python
display(spark.sql(f"SELECT * FROM json.`dbfs:/user/hive/warehouse/students/_delta_log/00000000000000000001.json`"))
รันคำสั่งนี้จะ error
%sql
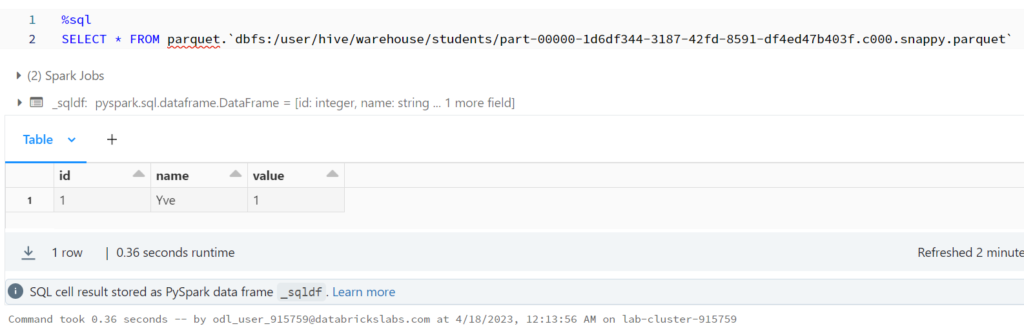
SELECT * FROM parquet.`dbfs:/user/hive/warehouse/students/part-00000-1d6df344-3187-42fd-8591-df4ed47b403f.c000.snappy.parquet`
AnalysisException: Incompatible format detected.

A transaction log for Delta was found at `dbfs:/user/hive/warehouse/students/_delta_log`,
but you are trying to read from `dbfs:/user/hive/warehouse/students/part-00000-57bc1277-813b-41c0-990d-4ba8fd05c9b1.c000.snappy.parquet` using format("parquet"). You must use
'format("delta")' when reading and writing to a delta table.

To disable this check, SET spark.databricks.delta.formatCheck.enabled=false
To learn more about Delta, see https://docs.databricks.com/delta/index.html; line 1 pos 14
ให้ SET ค่านี้ก่อน
%sql
SET spark.databricks.delta.formatCheck.enabled=false
รันใหม่จะได้ละ
%sql
SELECT * FROM parquet.`dbfs:/user/hive/warehouse/students/part-00000-1d6df344-3187-42fd-8591-df4ed47b403f.c000.snappy.parquet`
Signature:
df.show(
    n: int = 20,
    truncate: Union[bool, int] = True,
    vertical: bool = False,
) -> None
Docstring:
Prints the first ``n`` rows to the console.

.. versionadded:: 1.3.0

Parameters
----------
n : int, optional
    Number of rows to show.
truncate : bool or int, optional
    If set to ``True``, truncate strings longer than 20 chars by default.
    If set to a number greater than one, truncates long strings to length ``truncate``
    and align cells right.
vertical : bool, optional
    If set to ``True``, print output rows vertically (one line
    per column value).

Examples
--------
>>> df
DataFrame[age: int, name: string]
>>> df.show()
+---+-----+
|age| name|
+---+-----+
|  2|Alice|
|  5|  Bob|
+---+-----+
>>> df.show(truncate=3)
+---+----+
|age|name|
+---+----+
|  2| Ali|
|  5| Bob|
+---+----+
>>> df.show(vertical=True)
-RECORD 0-----
 age  | 2
 name | Alice
-RECORD 1-----
 age  | 5
 name | Bob
File:      /databricks/spark/python/pyspark/sql/dataframe.py
$ java --version
openjdk 11.0.18 2023-01-17
OpenJDK Runtime Environment (build 11.0.18+10-post-Ubuntu-0ubuntu120.04.1)
OpenJDK 64-Bit Server VM (build 11.0.18+10-post-Ubuntu-0ubuntu120.04.1, mixed mode, sharing)
$ javac --version
javac 11.0.18
ตรวจสอบการติดตั้งบน Ubuntu 22.04.2
$ java --version
openjdk 11.0.18 2023-01-17
OpenJDK Runtime Environment (build 11.0.18+10-post-Ubuntu-0ubuntu122.04)
OpenJDK 64-Bit Server VM (build 11.0.18+10-post-Ubuntu-0ubuntu122.04, mixed mode, sharing)
$ javac --version
javac 11.0.18
Managing Java
ใช้คำสั่ง update-alternatives
$ update-alternatives --help
Usage: update-alternatives [<option> ...] <command>

Commands:
  --install <link> <name> <path> <priority>
    [--slave <link> <name> <path>] ...
                           add a group of alternatives to the system.
  --remove <name> <path>   remove <path> from the <name> group alternative.
  --remove-all <name>      remove <name> group from the alternatives system.
  --auto <name>            switch the master link <name> to automatic mode.
  --display <name>         display information about the <name> group.
  --query <name>           machine parseable version of --display <name>.
  --list <name>            display all targets of the <name> group.
  --get-selections         list master alternative names and their status.
  --set-selections         read alternative status from standard input.
  --config <name>          show alternatives for the <name> group and ask the
                           user to select which one to use.
  --set <name> <path>      set <path> as alternative for <name>.
  --all                    call --config on all alternatives.

<link> is the symlink pointing to /etc/alternatives/<name>.
  (e.g. /usr/bin/pager)
<name> is the master name for this link group.
  (e.g. pager)
<path> is the location of one of the alternative target files.
  (e.g. /usr/bin/less)
<priority> is an integer; options with higher numbers have higher priority in
  automatic mode.

Options:
  --altdir <directory>     change the alternatives directory.
  --admindir <directory>   change the administrative directory.
  --log <file>             change the log file.
  --force                  allow replacing files with alternative links.
  --skip-auto              skip prompt for alternatives correctly configured
                           in automatic mode (relevant for --config only)
  --quiet                  quiet operation, minimal output.
  --verbose                verbose operation, more output.
  --debug                  debug output, way more output.
  --help                   show this help message.
  --version                show the version.
You can have multiple Java installations on one server. You can configure which version is the default for use on the command line by using the update-alternatives command.
$ sudo update-alternatives --config java
ถ้ามี java ตัวเดียวก็จะขึ้นประมาณนี้
$ sudo update-alternatives --config java
There is only one alternative in link group java (providing /usr/bin/java): /usr/lib/jvm/java-11-openjdk-amd64/bin/java
Nothing to configure.
แต่ถ้ามี java หลายตัว ก็จะแสดงให้เราเลือก
javac ก็เหมือนกัน ใช้คำสั่ง
$ sudo update-alternatives --config javac
Setting the JAVA_HOME
$ sudo nano /etc/environment
At the end of this file, add the following line, and to not include the bin/ portion of the path: (หา path ได้ด้วยคำสั่ง update-alternatives)
JAVA_HOME="/usr/lib/jvm/java-11-openjdk-amd64"
JAVA_HOME="/usr/lib/jvm/java-8-openjdk-amd64"
Modifying this file will set the JAVA_HOME path for all users on your system.
Save the file and exit the editor.
Now reload this file to apply the changes to your current session:
$ apt --help
apt 2.4.8 (amd64)
Usage: apt [options] command

apt is a commandline package manager and provides commands for
searching and managing as well as querying information about packages.
It provides the same functionality as the specialized APT tools,
like apt-get and apt-cache, but enables options more suitable for
interactive use by default.

Most used commands:
  list - list packages based on package names
  search - search in package descriptions
  show - show package details
  install - install packages
  reinstall - reinstall packages
  remove - remove packages
  autoremove - Remove automatically all unused packages
  update - update list of available packages
  upgrade - upgrade the system by installing/upgrading packages
  full-upgrade - upgrade the system by removing/installing/upgrading packages
  edit-sources - edit the source information file
  satisfy - satisfy dependency strings

See apt(8) for more information about the available commands.
Configuration options and syntax is detailed in apt.conf(5).
Information about how to configure sources can be found in sources.list(5).
Package and version choices can be expressed via apt_preferences(5).
Security details are available in apt-secure(8).
                                        This APT has Super Cow Powers.
Update and Upgrade packages
update list of available packages
$ sudo apt update
list packages ที่สามารถอัพเกรดได้
$ apt list --upgradable
upgrade the system by installing/upgrading packages
To show or see information about the given package(s) including its dependencies, installation and download size, sources the package is available from, the description of the packages content and much more:
CapitalizedWords (or CapWords, or CamelCase – so named because of the bumpy look of its letters [4]). This is also sometimes known as StudlyCaps.Note: When using acronyms in CapWords, capitalize all the letters of the acronym. Thus HTTPServerError is better than HttpServerError.
mixedCase (differs from CapitalizedWords by initial lowercase character!)
Capitalized_Words_With_Underscores (ugly!)
Class Names
Class names should normally use the CapWords convention.
Function Names
Function names should be lowercase, with words separated by underscores as necessary to improve readability. (lower_case_with_underscores)
Variable Names
Variable names follow the same convention as function names.