Apache log4net™ กับ .NET 6 WinForms

สร้างโปรเจ็กส์แบบ Windows Forms App (winforms) ชื่อ WinFormsApp1

ดูไฟล์ Program.cs

namespace WinFormsApp1
{
    internal static class Program
    {
        /// <summary>
        ///  The main entry point for the application.
        /// </summary>
        [STAThread]
        static void Main()
        {
            // To customize application configuration such as set high DPI settings or default font,
            // see https://aka.ms/applicationconfiguration.
            ApplicationConfiguration.Initialize();
            Application.Run(new Form1());
        }
    }
}

ดูไฟล์ Form1.cs

namespace WinFormsApp1
{
    public partial class Form1 : Form
    {
        public Form1()
        {
            InitializeComponent();
        }
    }
}

ติดตั้ง Package log4net , Microsoft.Extensions.Hosting และ Microsoft.Extensions.Logging.Log4Net.AspNetCore

ดูไฟล์ WinFormsApp1.csproj

<Project Sdk="Microsoft.NET.Sdk">

  <PropertyGroup>
    <OutputType>WinExe</OutputType>
    <TargetFramework>net6.0-windows</TargetFramework>
    <Nullable>enable</Nullable>
    <UseWindowsForms>true</UseWindowsForms>
    <ImplicitUsings>enable</ImplicitUsings>
  </PropertyGroup>

  <ItemGroup>
    <PackageReference Include="log4net" Version="2.0.15" />
    <PackageReference Include="Microsoft.Extensions.Hosting" Version="6.0.1" />
    <PackageReference Include="Microsoft.Extensions.Logging.Log4Net.AspNetCore" Version="6.1.0" />
  </ItemGroup>

</Project>

สร้างไฟล์ log4net.config และ ตั้งค่า Copy to Output Directory เป็น Copy always

<?xml version="1.0" encoding="utf-8" ?>
<log4net>
  <appender name="RollingLogFileAppender" type="log4net.Appender.RollingFileAppender">
    <lockingModel type="log4net.Appender.FileAppender+MinimalLock"/>
    <file value="log/" />
    <datePattern value="yyMMdd'Jack.log'" />
    <staticLogFileName value="false"/>
    <appendToFile value="true"/>
    <rollingStyle value="Date"/>
    <maxSizeRollBackups value="100"/>
    <maximumFileSize value="15MB"/>
    <encoding value="UTF-8"/>
    <layout type="log4net.Layout.PatternLayout">
      <param name="ConversionPattern" value="%-5p%d{ HH:mm:ss} li:%line - [%method] %m  %n" />
    </layout>
  </appender>
  <root>
    <level value="ALL"/>
    <appender-ref ref="RollingLogFileAppender"/>
  </root>
</log4net>

แก้ไขไฟล์ Program.cs

using Microsoft.Extensions.DependencyInjection;
using Microsoft.Extensions.Hosting;
using Microsoft.Extensions.Logging;

namespace WinFormsApp1
{
    internal static class Program
    {
        /// <summary>
        ///  The main entry point for the application.
        /// </summary>
        [STAThread]
        static void Main()
        {
            // To customize application configuration such as set high DPI settings or default font,
            // see https://aka.ms/applicationconfiguration.
            ApplicationConfiguration.Initialize();

            ///Generate Host Builder and Register the Services for DI
            var builder = new HostBuilder()
               .ConfigureServices((hostContext, services) =>
               {
                   //Register all your services here
                   services.AddLogging(configure => configure.AddConsole())
                           .AddScoped<Form1>();
               }).ConfigureLogging(logBuilder =>
               {
                   logBuilder.SetMinimumLevel(LogLevel.Trace);
                   logBuilder.AddLog4Net("log4net.config");
               });

            var host = builder.Build();

            using (var serviceScope = host.Services.CreateScope())
            {
                var services = serviceScope.ServiceProvider;
                try
                {
                    var form1 = services.GetRequiredService<Form1>();
                    Application.Run(form1);

                    Console.WriteLine("Success");
                }
                catch (Exception ex)
                {
                    Console.WriteLine("Error");
                    Console.WriteLine(ex.ToString());
                }
            }
        }
    }
}

แก้ไขไฟล์ Form1.cs

using Microsoft.Extensions.Logging;

namespace WinFormsApp1
{
    public partial class Form1 : Form
    {
        private readonly ILogger _logger;
        public Form1(ILogger<Form1> logger)
        {
            InitializeComponent();
            _logger = logger;

            try
            {
                _logger.LogInformation("Form1 Started");
                MessageBox.Show("Hello World!");
            }
            catch (Exception ex)
            {
                _logger.LogError(ex.Message);
            }
        }
    }
}

.NET 6 – dotnet new blazorserver

  1. สร้างโปรเจ็กส์
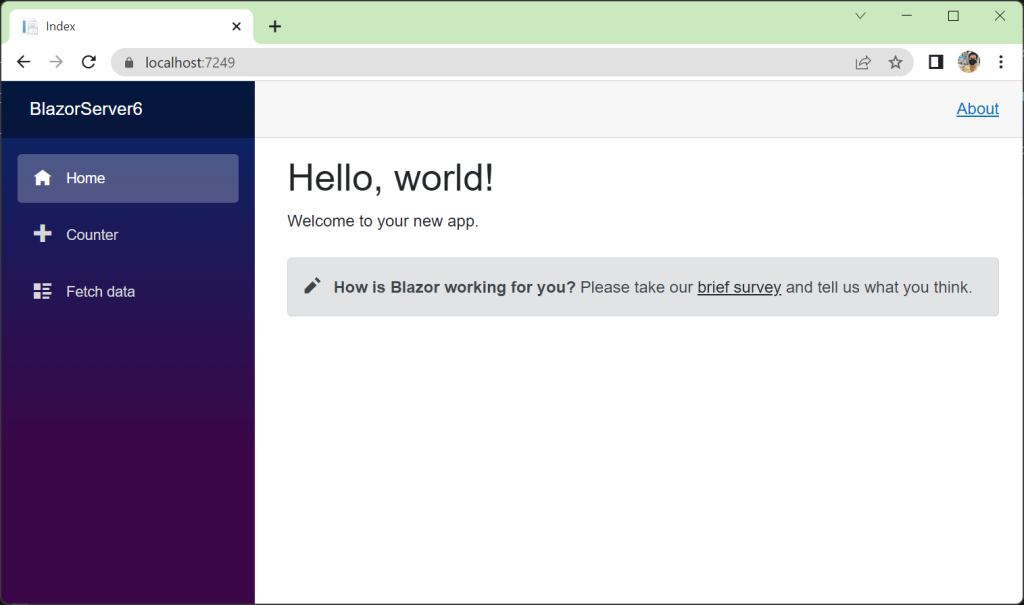
  2. หน้า Home
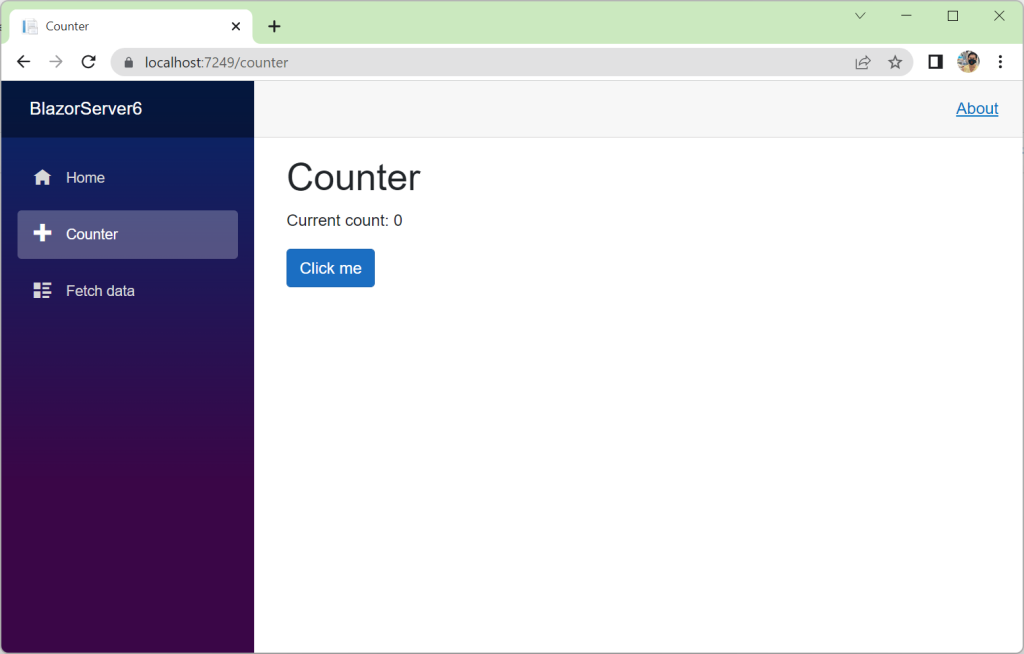
  3. หน้า Counter
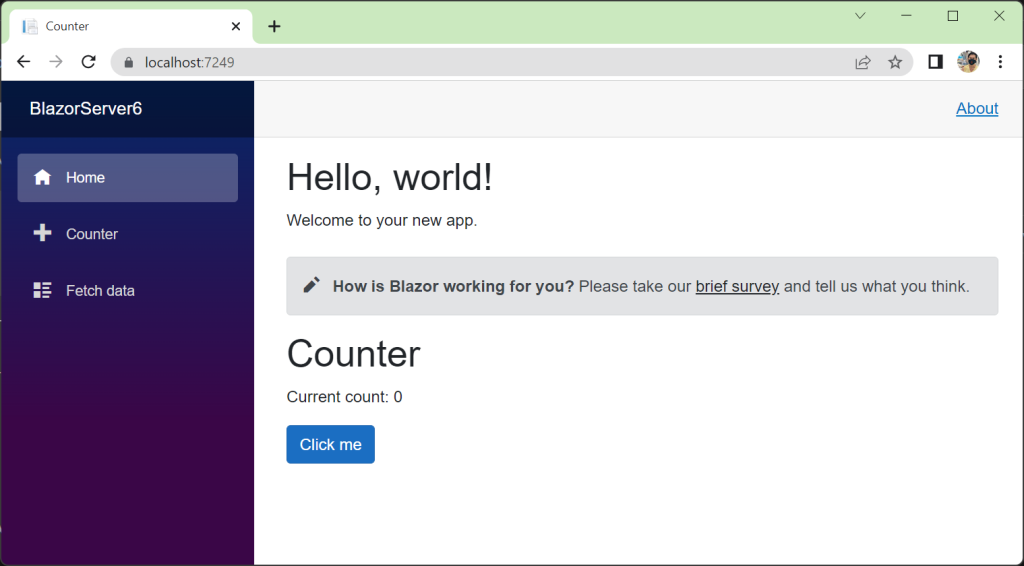
  4. Add a component
  5. Set properties on the child component

1. สร้างโปรเจ็กส์

สร้างโฟลเดอร์ Blazor6

> mkdir Blazor6
> cd Blazor6

สร้างโปรเจ็กส์ด้วย Template แบบ Blazor Server App

> dotnet new blazorserver -o BlazorServer6
> cd .\BlazorServer6\

ถ้าสร้างด้วย VS 2022 เลือก Blazor Server App

run โปรแกรม

> dotnet run
Building...
info: Microsoft.Hosting.Lifetime[14]
      Now listening on: https://localhost:7249
info: Microsoft.Hosting.Lifetime[14]
      Now listening on: http://localhost:5020

run โปรแกรมแบบ Hot reload

> dotnet watch
dotnet watch 🔥 Hot reload enabled. For a list of supported edits, see https://aka.ms/dotnet/hot-reload.
  💡 Press "Ctrl + R" to restart.

หรือ

> dotnet watch run
dotnet watch 🔥 Hot reload enabled. For a list of supported edits, see https://aka.ms/dotnet/hot-reload.
  💡 Press "Ctrl + R" to restart.

2. หน้า Home

ไฟล์ Pages/Index.razor

@page "/"

<PageTitle>Index</PageTitle>

<h1>Hello, world!</h1>

Welcome to your new app.

<SurveyPrompt Title="How is Blazor working for you?" />

บรรทัดที่ 9 เรียกใช้ SurveyPrompt พร้อมส่งค่า Title

ไฟล์ Shared/SurveyPrompt.razor

<div class="alert alert-secondary mt-4">
    <span class="oi oi-pencil me-2" aria-hidden="true"></span>
    <strong>@Title</strong>

    <span class="text-nowrap">
        Please take our
        <a target="_blank" class="font-weight-bold link-dark" href="https://go.microsoft.com/fwlink/?linkid=2149017">brief survey</a>
    </span>
    and tell us what you think.
</div>

@code {
    // Demonstrates how a parent component can supply parameters
    [Parameter]
    public string? Title { get; set; }
}

บรรทัดที่ 15 ประกาศตัวแปร Title
บรรทัดที่ 3 แสดงค่าตัวแปร Title

3. หน้า Counter

ไฟล์ Pages/Counter.razor

@page "/counter"

<PageTitle>Counter</PageTitle>

<h1>Counter</h1>

<p role="status">Current count: @currentCount</p>

<button class="btn btn-primary" @onclick="IncrementCount">Click me</button>

@code {
    private int currentCount = 0;

    private void IncrementCount()
    {
        currentCount++;
    }
}

4. Add a component

Each of the .razor files defines a UI component that can be reused.

ไฟล์ Pages/Index.razor

@page "/"

<PageTitle>Index</PageTitle>

<h1>Hello, world!</h1>

Welcome to your new app.

<SurveyPrompt Title="How is Blazor working for you?" />

<Counter />

บรรทัดที่ 11 Add a Counter component to the app’s homepage by adding a <Counter /> element

5. Set properties on the child component

Component parameters are specified using attributes or child content, which allow you to set properties on the child component. Define a parameter on the Counter component for specifying how much it increments with every button click:

ไฟล์ Pages/Counter.razor

@page "/counter"

<PageTitle>Counter</PageTitle>

<h1>Counter</h1>

<p role="status">Current count: @currentCount</p>

<button class="btn btn-primary" @onclick="IncrementCount">Click me</button>

@code {
    private int currentCount = 0;

    [Parameter]
    public int IncrementAmount { get; set; } = 1;

    private void IncrementCount()
    {
        currentCount += IncrementAmount;
    }
}

ไฟล์ Pages/Index.razor

@page "/"

<PageTitle>Index</PageTitle>

<h1>Hello, world!</h1>

Welcome to your new app.

<SurveyPrompt Title="How is Blazor working for you?" />

<Counter IncrementAmount="10" />

ASP.NET Core Blazor

Blazor is a framework for building interactive client-side web UI with .NET:

  • Create rich interactive UIs using C# instead of JavaScript.
  • Share server-side and client-side app logic written in .NET.
  • Render the UI as HTML and CSS for wide browser support, including mobile browsers.
  • Integrate with modern hosting platforms, such as Docker.
  • Build hybrid desktop and mobile apps with .NET and Blazor.

Components

Blazor apps are based on components. A component in Blazor is an element of UI, such as a page, dialog, or data entry form.

Components are .NET C# classes built into .NET assemblies that:

The component class is usually written in the form of a Razor markup page with a .razor file extension. Components in Blazor are formally referred to as Razor components, informally as Blazor components. Razor is a syntax for combining HTML markup with C# code designed for developer productivity. Razor allows you to switch between HTML markup and C# in the same file with IntelliSense programming support in Visual Studio. Razor Pages and MVC also use Razor. Unlike Razor Pages and MVC, which are built around a request/response model, components are used specifically for client-side UI logic and composition.

Blazor Server

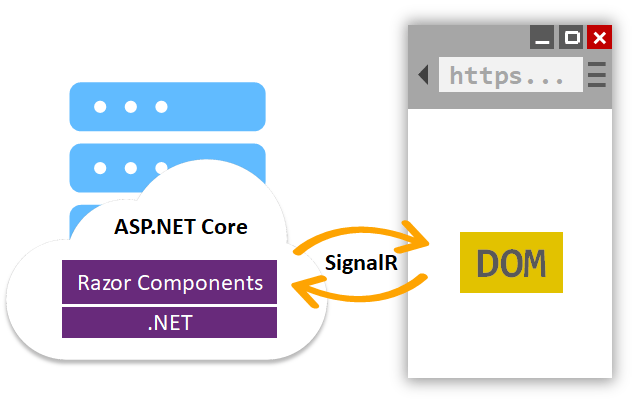
Blazor Server provides support for hosting Razor components on the server in an ASP.NET Core app. UI updates are handled over a SignalR connection.

The runtime stays on the server and handles:

  • Executing the app’s C# code.
  • Sending UI events from the browser to the server.
  • Applying UI updates to a rendered component that are sent back by the server.

The connection used by Blazor Server to communicate with the browser is also used to handle JavaScript interop calls.

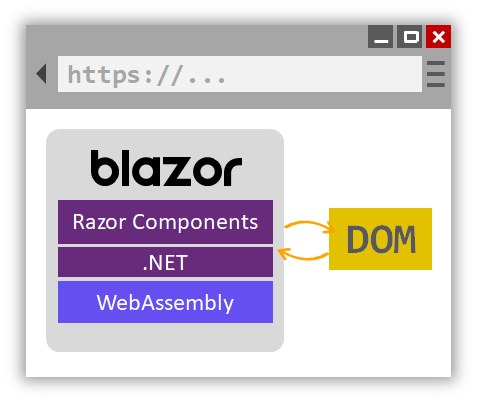
Blazor Server runs .NET code on the server and interacts with the Document Object Model on the client over a SignalR connection

Blazor Server apps render content differently than traditional models for rendering UI in ASP.NET Core apps using Razor views or Razor Pages. Both models use the Razor language to describe HTML content for rendering, but they significantly differ in how markup is rendered.

When a Razor Page or view is rendered, every line of Razor code emits HTML in text form. After rendering, the server disposes of the page or view instance, including any state that was produced. When another request for the page occurs, the entire page is rerendered to HTML again and sent to the client.

Blazor WebAssembly

Blazor WebAssembly is a single-page app (SPA) framework for building interactive client-side web apps with .NET. Blazor WebAssembly uses open web standards without plugins or recompiling code into other languages. Blazor WebAssembly works in all modern web browsers, including mobile browsers.

Running .NET code inside web browsers is made possible by WebAssembly (abbreviated wasm). WebAssembly is a compact bytecode format optimized for fast download and maximum execution speed. WebAssembly is an open web standard and supported in web browsers without plugins.

WebAssembly code can access the full functionality of the browser via JavaScript, called JavaScript interoperability, often shortened to JavaScript interop or JS interop. .NET code executed via WebAssembly in the browser runs in the browser’s JavaScript sandbox with the protections that the sandbox provides against malicious actions on the client machine.

Blazor WebAssembly runs .NET code in the browser with WebAssembly.

When a Blazor WebAssembly app is built and run in a browser:

  • C# code files and Razor files are compiled into .NET assemblies.
  • The assemblies and the .NET runtime are downloaded to the browser.
  • Blazor WebAssembly bootstraps the .NET runtime and configures the runtime to load the assemblies for the app. The Blazor WebAssembly runtime uses JavaScript interop to handle DOM manipulation and browser API calls.

The size of the published app, its payload size, is a critical performance factor for an app’s usability. A large app takes a relatively long time to download to a browser, which diminishes the user experience. Blazor WebAssembly optimizes payload size to reduce download times:

  • Unused code is stripped out of the app when it’s published by the Intermediate Language (IL) Trimmer.
  • HTTP responses are compressed.
  • The .NET runtime and assemblies are cached in the browser.

Create and run Azure Functions locally by using the Core Tools (dotnet)

Azure Functions Core Tools

The Azure Functions Core Tools provide a local development experience for creating, developing, testing, running, and debugging Azure Functions.

The Azure Functions Core Tools are a set of command-line tools that you can use to develop and test Azure Functions on your local computer.

Versions

  • v1 (v1.x branch): Requires .NET 4.7.1 Windows Only
  • v2 (dev branch): Self-contained cross-platform package
  • v3: (v3.x branch): Self-contained cross-platform package
  • v4: (v4.x branch): Self-contained cross-platform package (recommended)

Installing on Windows

winget install Microsoft.AzureFunctionsCoreTools

The Core Tools are packaged as a single command-line utility named func. If you run func from the command line without any other commands, it will display version information and a usage guide.

> func

                  %%%%%%
                 %%%%%%
            @   %%%%%%    @
          @@   %%%%%%      @@
       @@@    %%%%%%%%%%%    @@@
     @@      %%%%%%%%%%        @@
       @@         %%%%       @@
         @@      %%%       @@
           @@    %%      @@
                %%
                %


Azure Functions Core Tools
Core Tools Version:       4.0.4629 Commit hash: N/A  (64-bit)
Function Runtime Version: 4.6.1.18388

Usage: func [context] [context] <action> [-/--options]

Contexts:
azure       Commands to log in to Azure and manage resources
durable     Commands for working with Durable Functions
extensions  Commands for installing extensions
function    Commands for creating and running functions locally
host        Commands for running the Functions host locally
kubernetes  Commands for working with Kubernetes and Azure Functions
settings    Commands for managing environment settings for the local Functions host
templates   Commands for listing available function templates

Actions:
start   Launches the functions runtime host
    --port [-p]             Local port to listen on. Default: 7071
    --cors                  A comma separated list of CORS origins with no spaces. Example: https://functions.azure.com
                            ,https://functions-staging.azure.com
    --cors-credentials      Allow cross-origin authenticated requests (i.e. cookies and the Authentication header)
    --timeout [-t]          Timeout for the functions host to start in seconds. Default: 20 seconds.
    --useHttps              Bind to https://localhost:{port} rather than http://localhost:{port}. By default it creates
                             and trusts a certificate.
    --cert                  for use with --useHttps. The path to a pfx file that contains a private key
    --password              to use with --cert. Either the password, or a file that contains the password for the pfx f
                            ile
    --language-worker       Arguments to configure the language worker.
    --no-build              Do no build current project before running. For dotnet projects only. Default is set to fal
                            se.
    --enableAuth            Enable full authentication handling pipeline.
    --functions             A space seperated list of functions to load.
    --verbose               When false, hides system logs other than warnings and errors.
    --dotnet-isolated-debug When specified, set to true, pauses the .NET Worker process until a debugger is attached.
    --enable-json-output    Signals to Core Tools and other components that JSON line output console logs, when applica
                            ble, should be emitted.
    --json-output-file      If provided, a path to the file that will be used to write the output when using --enable-j
                            son-output.

new     Create a new function from a template. Aliases: new, create
    --language [-l]  Template programming language, such as C#, F#, JavaScript, etc.
    --template [-t]  Template name
    --name [-n]      Function name
    --authlevel [-a] Authorization level is applicable to templates that use Http trigger, Allowed values: [function, a
                     nonymous, admin]. Authorization level is not enforced when running functions from core tools
    --csx            use old style csx dotnet functions

init    Create a new Function App in the current folder. Initializes git repo.
    --source-control       Run git init. Default is false.
    --worker-runtime       Runtime framework for the functions. Options are: dotnet, dotnetIsolated, node, python, powe
                           rshell, custom
    --force                Force initializing
    --docker               Create a Dockerfile based on the selected worker runtime
    --docker-only          Adds a Dockerfile to an existing function app project. Will prompt for worker-runtime if not
                            specified or set in local.settings.json
    --csx                  use csx dotnet functions
    --language             Initialize a language specific project. Currently supported when --worker-runtime set to nod
                           e. Options are - "typescript" and "javascript"
    --managed-dependencies Installs managed dependencies. Currently, only the PowerShell worker runtime supports this f
                           unctionality.
    --no-docs              Do not create getting started documentation file. Currently supported when --worker-runtime
                           set to python.

logs    Gets logs of Functions running on custom backends
    --platform Hosting platform for the function app. Valid options: kubernetes
    --name     Function name

Local development vs. Azure portal development

The Azure portal has a powerful functions editor experience. In most cases, it doesn’t support modifying functions that you develop locally. Once you start using a local development workflow based on Core Tools, you can’t use the Azure portal to make changes to your functions.

Function apps and functions projects

Every function published to Azure belongs to a function app, which is a collection of one or more functions that Azure publishes together into the same environment. All of the functions in a function app share a common set of configuration values. Build them all for the same language runtime. A function app is an Azure resource that can be configured and managed independently.

When you develop functions locally, you work within a functions project. The project is a folder that contains the code and configuration files that define your functions. A functions project on your computer is equivalent to a function app in Azure, and can contain multiple functions that use the same language runtime.

Create a new functions project with func init

สร้าง functions project ชื่อ FunctionCS2207

> mkdir FunctionCS2207
> cd .\FunctionCS2207\

To create a new functions project, run func init on the command line.

> func init
Use the up/down arrow keys to select a worker runtime:
dotnet
dotnet (isolated process)
node
python
powershell
custom

> func init
Use the up/down arrow keys to select a worker runtime:dotnet
Use the up/down arrow keys to select a language:
c#
f#

> func init
Use the up/down arrow keys to select a worker runtime:dotnet
Use the up/down arrow keys to select a language:c#

Writing C:\Project\FunctionCS2207\.vscode\extensions.json

func init will ask you which language runtime you’d like to use for the app and tailor the project folder’s contents appropriately.

ดูไฟล์ที่คำสั่ง func init สร้างมาให้ เมื่อเลือกเป็น dotnet และ c#

$ tree -a
.
├── .gitignore
├── .vscode
│   └── extensions.json
├── FunctionCS2207.csproj
├── host.json
└── local.settings.json

1 directory, 5 files

When you create a new functions project, the files included in the project folder depend on the language runtime you select. Regardless of the runtime you choose, the two most critical project files are always present:

  • host.json stores runtime configuration values, such as logging options, for the function app. The settings stored in this file are used both when running functions locally and in Azure.
  • local.settings.json stores configuration values that only apply to the function app when it’s run locally with the Core Tools. This file contains two kinds of settings:
    • Local runtime settings: Used to configure the local functions runtime itself.
    • Custom application settings: You add and configure them based on your app’s needs. All the functions in the app can access and use them.

host.json

{
    "version": "2.0",
    "logging": {
        "applicationInsights": {
            "samplingSettings": {
                "isEnabled": true,
                "excludedTypes": "Request"
            }
        }
    }
}

local.settings.json

{
    "IsEncrypted": false,
    "Values": {
        "AzureWebJobsStorage": "UseDevelopmentStorage=true",
        "FUNCTIONS_WORKER_RUNTIME": "dotnet"
    }
}

FunctionCS2207.csproj

<Project Sdk="Microsoft.NET.Sdk">
  <PropertyGroup>
    <TargetFramework>net6.0</TargetFramework>
    <AzureFunctionsVersion>v4</AzureFunctionsVersion>
  </PropertyGroup>
  <ItemGroup>
    <PackageReference Include="Microsoft.NET.Sdk.Functions" Version="4.0.1" />
  </ItemGroup>
  <ItemGroup>
    <None Update="host.json">
      <CopyToOutputDirectory>PreserveNewest</CopyToOutputDirectory>
    </None>
    <None Update="local.settings.json">
      <CopyToOutputDirectory>PreserveNewest</CopyToOutputDirectory>
      <CopyToPublishDirectory>Never</CopyToPublishDirectory>
    </None>
  </ItemGroup>
</Project>

Functions projects that func init generates don’t have any functions in them. Let’s find out how to add one.

Create a new function with func new

Each individual function in a project requires code and a configuration to define its behavior. Running func new in a functions project folder will create a new function and all the files you need to get started developing.

สร้าง function ชื่อ HttpExample โดยใช้ template แบบ HttpTrigger

> func new
Use the up/down arrow keys to select a template:
QueueTrigger
HttpTrigger
BlobTrigger
TimerTrigger
KafkaTrigger
KafkaOutput
DurableFunctionsOrchestration
SendGrid
EventHubTrigger
ServiceBusQueueTrigger
ServiceBusTopicTrigger
EventGridTrigger
CosmosDBTrigger
IotHubTrigger

> func new
Use the up/down arrow keys to select a template:Function name: HttpExample
HttpExample

The function "HttpExample" was created successfully from the "HttpTrigger" template.

จะได้ไฟล์ HttpExample.cs

using System;
using System.IO;
using System.Threading.Tasks;
using Microsoft.AspNetCore.Mvc;
using Microsoft.Azure.WebJobs;
using Microsoft.Azure.WebJobs.Extensions.Http;
using Microsoft.AspNetCore.Http;
using Microsoft.Extensions.Logging;
using Newtonsoft.Json;

namespace FunctionCS2207
{
    public static class HttpExample
    {
        [FunctionName("HttpExample")]
        public static async Task<IActionResult> Run(
            [HttpTrigger(AuthorizationLevel.Function, "get", "post", Route = null)] HttpRequest req,
            ILogger log)
        {
            log.LogInformation("C# HTTP trigger function processed a request.");

            string name = req.Query["name"];

            string requestBody = await new StreamReader(req.Body).ReadToEndAsync();
            dynamic data = JsonConvert.DeserializeObject(requestBody);
            name = name ?? data?.name;

            string responseMessage = string.IsNullOrEmpty(name)
                ? "This HTTP triggered function executed successfully. Pass a name in the query string or in the request body for a personalized response."
                : $"Hello, {name}. This HTTP triggered function executed successfully.";

            return new OkObjectResult(responseMessage);
        }
    }
}

Run functions locally

Functions aren’t programs that can be run on their own: they must be hosted. The function host is what powers everything outside of your function code: it loads the configuration, listens for triggers and HTTP requests, starts the worker process for the language your functions are written in, writes log output, and more. In Azure, function apps run the function host automatically when they start.

You can use the Core Tools to run your own instance of the functions host and try out your functions locally before you publish them. By running your functions before publishing them, you can make sure your configuration and code loads correctly and test out your functions by making real HTTP calls to them without the need for Azure resources.

To start the functions host locally, run func start from a functions project folder. At the end of the output, the Core Tools will display local URLs you can use to call each of your functions. While the host is running, you can use any tools or libraries that make HTTP calls, like curl, to interact with your functions. The Core Tools will write any log output produced by the host to the terminal in real time.

> func start
Microsoft (R) Build Engine version 17.2.0+41abc5629 for .NET
Copyright (C) Microsoft Corporation. All rights reserved.

  Determining projects to restore...
  All projects are up-to-date for restore.
  FunctionCS2207 -> C:\Project\FunctionCS2207\bin\output\FunctionCS2207.dll

Build succeeded.
    0 Warning(s)
    0 Error(s)

Time Elapsed 00:00:05.59


Azure Functions Core Tools
Core Tools Version:       4.0.4629 Commit hash: N/A  (64-bit)
Function Runtime Version: 4.6.1.18388

[2022-07-25T09:35:23.827Z] Found C:\Project\FunctionCS2207\FunctionCS2207.csproj. Using for user secrets file configuration.

Functions:

        HttpExample: [GET,POST] http://localhost:7071/api/HttpExample

For detailed output, run func with --verbose flag.

ลองเรียกไปที่ http://localhost:7071/api/HttpExample จะได้

This HTTP triggered function executed successfully. Pass a name in the query string or in the request body for a personalized response.

ให้ค่า name http://localhost:7071/api/HttpExample?name=jack

Hello, jack. This HTTP triggered function executed successfully.

ติดตั้ง package เพิ่ม

ทดลองติดตีั้ง NuGet Gallery | NodaTime 3.1.0

> dotnet add package NodaTime

ไฟล์ FunctionCS2207.csproj

  <ItemGroup>
    <PackageReference Include="Microsoft.NET.Sdk.Functions" Version="4.0.1" />
    <PackageReference Include="NodaTime" Version="3.1.0" />
  </ItemGroup>

เพิ่ม using ที่ไฟล์ HttpExample.cs

using NodaTime;

ลองรัน func start ถ้าไม่ error ก็ติดตั้ง package สำเร็จ

.NET 6 – dotnet new console

สร้างโฟลเดอร์ Console6

>  mkdir Console6
>  cd Console6

สร้างโปรเจ็กส์ด้วย Template แบบ Console Application

>  dotnet new console -o Console6

ถ้าสร้างด้วย VS 2022 เลือก Console App

จะได้ไฟล์

  1. Console6\Console6.csproj
  2. Console6\Program.cs

ไฟล์ Console6.csproj

<Project Sdk="Microsoft.NET.Sdk">

  <PropertyGroup>
    <OutputType>Exe</OutputType>
    <TargetFramework>net6.0</TargetFramework>
    <ImplicitUsings>enable</ImplicitUsings>
    <Nullable>enable</Nullable>
  </PropertyGroup>

</Project>

ไฟล์ Program.cs

// See https://aka.ms/new-console-template for more information
Console.WriteLine("Hello, World!");

run โปรแกรม

> cd Console6
> dotnet run
Hello, World!

X509Certificate2 กับ .NET 6 Console

ดูข้อมูลของ certificate

using System.Reflection;
using System.Security.Cryptography.X509Certificates;
using System.Xml;

namespace ConsoleApp6;

class Program
{
    public static readonly log4net.ILog log = log4net.LogManager.GetLogger(typeof(Program));

    static void Main()
    {
        try
        {
            XmlDocument log4netConfig = new XmlDocument();
            log4netConfig.Load(File.OpenRead("log4net.config"));
            var repo = log4net.LogManager.CreateRepository(Assembly.GetEntryAssembly(),
                       typeof(log4net.Repository.Hierarchy.Hierarchy));
            log4net.Config.XmlConfigurator.Configure(repo, log4netConfig["log4net"]);

            log.Info("Hello World!");

            //Create X509Certificate2 object from .p12 file.
            X509Certificate2 x509 = new X509Certificate2(@"C:\file.p12", "password",
                X509KeyStorageFlags.Exportable | X509KeyStorageFlags.PersistKeySet);

            //Create X509Certificate2 object from .cer file.
            //byte[] rawData = ReadFile(args[0]);
            //x509.Import(rawData);

            //Log information contained in the certificate.
            log.Info(string.Format("Subject: {0}", x509.Subject));
            log.Info(string.Format("Issuer: {0}", x509.Issuer));
            log.Info(string.Format("Version: {0}", x509.Version));
            log.Info(string.Format("Valid Date: {0}", x509.NotBefore));
            log.Info(string.Format("Expiry Date: {0}", x509.NotAfter));
            log.Info(string.Format("Thumbprint: {0}", x509.Thumbprint));
            log.Info(string.Format("Serial Number: {0}", x509.SerialNumber));
            log.Info(string.Format("Friendly Name: {0}", x509.PublicKey.Oid.FriendlyName));
            log.Info(string.Format("Public Key Format: {0}", x509.PublicKey.EncodedKeyValue.Format(true)));
            log.Info(string.Format("Raw Data Length: {0}", x509.RawData.Length));
            log.Info(string.Format("Certificate to string: {0}", x509.ToString(true)));
            log.Info(string.Format("Certificate to XML String: {0}", x509.PublicKey.Key.ToXmlString(false)));

            ////Add the certificate to a X509Store.
            //X509Store store = new X509Store();
            //store.Open(OpenFlags.MaxAllowed);
            //store.Add(x509);
            //store.Close();
        }
        catch (Exception ex)
        {
            log.Error(ex.Message);
            log.Error(ex.ToString());
        }
    }
}

Stamp CA ลงไฟล์ PDF

ติดตั้ง Package

PM> Install-Package iTextSharp -Version 5.5.13.2
PM> Install-Package System.Windows.Extensions -Version 6.0.0
using iTextSharp.text;
using iTextSharp.text.pdf;
using iTextSharp.text.pdf.security;
using System.Reflection;
using System.Runtime.Versioning;
using System.Security.Cryptography.X509Certificates;
using System.Xml;

namespace ConsoleApp6;

[SupportedOSPlatform("windows")]
class Program
{
    public static readonly log4net.ILog log = log4net.LogManager.GetLogger(typeof(Program));

    static void Main()
    {
        try
        {
            XmlDocument log4netConfig = new XmlDocument();
            log4netConfig.Load(File.OpenRead("log4net.config"));
            var repo = log4net.LogManager.CreateRepository(Assembly.GetEntryAssembly(),
                       typeof(log4net.Repository.Hierarchy.Hierarchy));
            log4net.Config.XmlConfigurator.Configure(repo, log4netConfig["log4net"]);

            log.Info("Hello World!");

            //Create X509Certificate2 object from .p12 file.
            X509Certificate2 x509 = new X509Certificate2(@"C:\file.p12", "password",
                X509KeyStorageFlags.Exportable | X509KeyStorageFlags.PersistKeySet);

            //Create X509Certificate2 object from .cer file.
            //byte[] rawData = ReadFile(args[0]);
            //x509.Import(rawData);

            //Add the certificate to a X509Store.
            X509Store store = new X509Store();
            store.Open(OpenFlags.MaxAllowed);
            store.Add(x509);


            X509Certificate2Collection sel = X509Certificate2UI.SelectFromCollection(store.Certificates, null, null, X509SelectionFlag.SingleSelection);
            // X509Certificate2Collection sel = store.Certificates;

            X509Certificate2 cert = sel[0];

            Org.BouncyCastle.X509.X509CertificateParser cp = new Org.BouncyCastle.X509.X509CertificateParser();
            Org.BouncyCastle.X509.X509Certificate[] chain = new Org.BouncyCastle.X509.X509Certificate[] {
            cp.ReadCertificate(cert.RawData)};

            //IExternalSignature externalSignature = new X509Certificate2Signature(cert, "SHA-1");
            //IExternalSignature externalSignature = new X509Certificate2Signature(cert, DigestAlgorithms.SHA256);

            // var pk = Org.BouncyCastle.Security.DotNetUtilities.GetKeyPair(x509.PrivateKey).Private;
            var pk = Org.BouncyCastle.Security.DotNetUtilities.GetKeyPair(x509.GetRSAPrivateKey()).Private;
            IExternalSignature externalSignature = new PrivateKeySignature(pk, "SHA-256");

            string pathToBasePdf = @"c:\tmp\InputPDF.pdf";
            string pathToSignPdf = @"c:\tmp\OutputPDF.pdf";
            //string pathToSignatureImage = "";
            PdfReader pdfReader = new PdfReader(pathToBasePdf);

            var signedPdf = new FileStream(pathToSignPdf, FileMode.Create);

            PdfStamper pdfStamper = PdfStamper.CreateSignature(pdfReader, signedPdf, '\0');
            PdfSignatureAppearance signatureAppearance = pdfStamper.SignatureAppearance;

            // signatureAppearance.SignatureGraphic = Image.GetInstance(pathToSignatureImage);
            signatureAppearance.SetVisibleSignature(new Rectangle(100, 100, 250, 150), pdfReader.NumberOfPages, "Signature");
            //signatureAppearance.SignatureRenderingMode = PdfSignatureAppearance.RenderingMode.GRAPHIC_AND_DESCRIPTION;
            signatureAppearance.SignatureRenderingMode = PdfSignatureAppearance.RenderingMode.DESCRIPTION;

            MakeSignature.SignDetached(signatureAppearance, externalSignature, chain, null, null, null, 0, CryptoStandard.CMS);

            store.Close();
        }
        catch (Exception ex)
        {
            log.Error(ex.Message);
            log.Error(ex.ToString());
        }
    }
}

แปลงไฟล์ PDF เป็น Base64String กับ .NET 6 WebApi

สร้างโปรเจ็กส์แบบ ASP.NET Core Web API

เพิ่ม API Controller ชื่อ Values (Controllers/ValuesController.cs)

using Microsoft.AspNetCore.Mvc;

// For more information on enabling Web API for empty projects, visit https://go.microsoft.com/fwlink/?LinkID=397860

namespace WebApi1.Controllers
{
    [Route("[controller]")]
    [ApiController]
    public class ValuesController : ControllerBase
    {
        private readonly ILogger<ValuesController> _logger;
        private IWebHostEnvironment _env;

        public ValuesController(ILogger<ValuesController> logger
            , IWebHostEnvironment env)
        {
            _logger = logger;
            _env = env;
        }

        // GET api/<ValuesController>/5
        [HttpGet("{id}")]
        public string Get(int id)
        {
            string rootPath;
            if (!string.IsNullOrEmpty(_env.WebRootPath))
                rootPath = _env.WebRootPath;
            else
                rootPath = _env.ContentRootPath;
            _logger.LogInformation($"rootPath  = {rootPath}");


            #region Convert byte[] to Base64String
            string pdfPathIP = System.IO.Path.Combine(rootPath, "resource/testIP.pdf");
            _logger.LogInformation($"pdfPathIP = {pdfPathIP}");
            byte[] bytesIP = System.IO.File.ReadAllBytes(pdfPathIP);
            string pdfBase64 = Convert.ToBase64String(bytesIP);
            #endregion


            #region Convert Base64String to byte[]
            string pdfPathOP = System.IO.Path.Combine(rootPath, "resource/testOP.pdf");
            _logger.LogInformation($"pdfPathOP = {pdfPathOP}");
            byte[] bytesOP = Convert.FromBase64String(pdfBase64);
            System.IO.File.WriteAllBytes(pdfPathOP, bytesOP);
            #endregion

            return pdfBase64;
        }
    }
}

วางไฟล์ทดสอบไว้ที่ resource/testIP.pdf

ทดลองเรียก https://localhost:7034/values/5

จะได้ไฟล์ resource/testOP.pdf