- ติดตั้ง kubectl บน Windows
- ติดตั้ง minikube บน Windows
- ติดตั้ง helm
- ติดตั้ง JupyterHub
Link
- JupyterHub https://jupyter.org/hub
- Github https://github.com/jupyterhub
Document

ติดตั้ง Kubernetes บน Windows
1.ติดตั้ง kubectl บน Windows
Require Docker 18.09 or higher
ติดตั้งด้วย Chocolatey
เปิด PowerShell (Run as administrator)
Set-ExecutionPolicy Bypass -Scope Process -Force; [System.Net.ServicePointManager]::SecurityProtocol = [System.Net.ServicePointManager]::SecurityProtocol -bor 3072; iex ((New-Object System.Net.WebClient).DownloadString('https://chocolatey.org/install.ps1'))
choco install kubernetes-cli
ตรวจสอบว่าติดตั้งเรียบร้อยมั๊ย
>kubectl version --client
Client Version: version.Info{Major:"1", Minor:"21", GitVersion:"v1.21.2", GitCommit:"092fbfbf53427de67cac1e9fa54aaa09a28371d7", GitTreeState:"clean", BuildDate:"2021-06-16T12:59:11Z", GoVersion:"go1.16.5", Compiler:"gc", Platform:"windows/amd64"}
ไปที่ home directory
cd ~
สร้างไดเร็กทอรี่ .kube
mkdir .kube
สร้างไฟล์ .kube/config
Verify kubectl configuration
> kubectl cluster-info
ถ้าได้แบบนี้ก็ ok
Kubernetes control plane is running at https://127.0.0.1:62648
CoreDNS is running at https://127.0.0.1:62648/api/v1/namespaces/kube-system/services/kube-dns:dns/proxy

To further debug and diagnose cluster problems, use 'kubectl cluster-info dump'.
แต่ถ้าได้แบบนี้ แสดงว่ายังไม่ได้สั่ง minikube start (ติดตั้ง minikube ตามข้อ 2 ก่อน)
To further debug and diagnose cluster problems, use 'kubectl cluster-info dump'.
Unable to connect to the server: dial tcp [::1]:8080: connectex: No connection could be made because the target machine actively refused it.
เปิด browser ไปที่ https://127.0.0.1:62648 จะได้
{
  "kind": "Status",
  "apiVersion": "v1",
  "metadata": {

  },
  "status": "Failure",
  "message": "forbidden: User \"system:anonymous\" cannot get path \"/\"",
  "reason": "Forbidden",
  "details": {

  },
  "code": 403
}
แปลว่า ok ใช้ได้ เพราะยังไม่ได้ authen
kubectl cluster-info dump
> kubectl describe service kubernetes
Name:              kubernetes
Namespace:         default
Labels:            component=apiserver
                   provider=kubernetes
Annotations:       <none>
Selector:          <none>
Type:              ClusterIP
IP Family Policy:  SingleStack
IP Families:       IPv4
IP:                10.96.0.1
IPs:               10.96.0.1
Port:              https  443/TCP
TargetPort:        8443/TCP
Endpoints:         192.168.49.2:8443
Session Affinity:  None
Events:            <none>
> kubectl proxy
Starting to serve on 127.0.0.1:8001
2.ติดตั้ง minikube บน Windows
ลง Kubernetes ผ่าน Minikube
ดาว์นโหลด minikube-installer.exe และติดตั้ง
Start your cluster เปิด cmd ด้วยสิทธิ admin (Run as administrator)
minikube start
Interact with your cluster
If you already have kubectl installed, you can now use it to access your shiny new cluster:
> kubectl get po -A
NAMESPACE              NAME                                         READY   STATUS    RESTARTS   AGE
default                balanced-5744b548b4-n4wvb                    1/1     Running   1          12d
default                hello-minikube-6ddfcc9757-kvbzz              1/1     Running   3          14d
jhub                   continuous-image-puller-lqwk7                1/1     Running   2          14d
jhub                   hub-d7df4d54-l544t                           1/1     Running   2          14d
jhub                   proxy-5d5d74db85-c9kms                       1/1     Running   2          14d
jhub                   user-scheduler-544479f8b7-fppxn              1/1     Running   2          14d
jhub                   user-scheduler-544479f8b7-vfk95              1/1     Running   2          14d
kube-system            coredns-558bd4d5db-mz5j7                     1/1     Running   5          14d
kube-system            etcd-minikube                                1/1     Running   5          14d
kube-system            kube-apiserver-minikube                      1/1     Running   5          14d
kube-system            kube-controller-manager-minikube             1/1     Running   5          14d
kube-system            kube-proxy-gpp47                             1/1     Running   5          14d
kube-system            kube-scheduler-minikube                      1/1     Running   5          14d
kube-system            storage-provisioner                          1/1     Running   10         14d
kubernetes-dashboard   dashboard-metrics-scraper-7976b667d4-dqc75   1/1     Running   3          14d
kubernetes-dashboard   kubernetes-dashboard-6fcdf4f6d-8rswz         1/1     Running   5          14d
แสดง dashboard
minikube dashboard
LoadBalancer deployments
To access a LoadBalancer deployment, use the “minikube tunnel” command. Here is an example deployment:
kubectl create deployment balanced --image=k8s.gcr.io/echoserver:1.4
kubectl expose deployment balanced --type=LoadBalancer --port=8080
In another window, start the tunnel to create a routable IP for the ‘balanced’ deployment:
minikube tunnel
To find the routable IP, run this command and examine the EXTERNAL-IP column:
kubectl get services balanced
Manage your cluster
minikube pause
minikube stop
minikube addons list
3.ติดตั้ง helm
ติดตั้ง helm ด้วย Chocolatey
choco install kubernetes-helm
ตรวจสอบ
helm version
4.ติดตั้ง JupyterHub
Initialize a Helm chart configuration file ด้วยการสร้างไฟล์ config.yaml
เช่นสร้างไว้ที่ C:\helm\config.yaml แล้วใส่ข้อความ (ใน comment) ตามนี้
# This file can update the JupyterHub Helm chart's default configuration values.
#
# For reference see the configuration reference and default values, but make
# sure to refer to the Helm chart version of interest to you!
#
# Introduction to YAML:     https://www.youtube.com/watch?v=cdLNKUoMc6c
# Chart config reference:   https://zero-to-jupyterhub.readthedocs.io/en/stable/resources/reference.html
# Chart default values:     https://github.com/jupyterhub/zero-to-jupyterhub-k8s/blob/HEAD/jupyterhub/values.yaml
# Available chart versions: https://jupyterhub.github.io/helm-chart/
#
ติดตั้ง JupyterHub
helm repo add jupyterhub https://jupyterhub.github.io/helm-chart/
helm repo update
จะเห็น output ประมาณนี้
Hang tight while we grab the latest from your chart repositories...
...Skip local chart repository
...Successfully got an update from the "stable" chart repository
...Successfully got an update from the "jupyterhub" chart repository
Update Complete. ⎈ Happy Helming!⎈
Now install the chart configured by your config.yaml by running this command from the directory that contains your config.yaml:
helm upgrade --cleanup-on-fail \
  --install <helm-release-name> jupyterhub/jupyterhub \
  --namespace <k8s-namespace> \
  --create-namespace \
  --version=<chart-version> \
  --values config.yaml
เช่น
helm upgrade --cleanup-on-fail --install jhub jupyterhub/jupyterhub --namespace jhub --create-namespace --version=1.0.0 --values config.yaml
While Step 2 is running, you can see the pods being created by entering in a different terminal:
kubectl get pod --namespace jhub
Wait for the hub and proxy pod to enter the Running state.
NAME                    READY     STATUS    RESTARTS   AGE
hub-5d4ffd57cf-k68z8    1/1       Running   0          37s
proxy-7cb9bc4cc-9bdlp   1/1       Running   0          37s
Find the IP we can use to access the JupyterHub. Run the following command until the EXTERNAL-IP of the proxy-public service is available like in the example output.
kubectl get service --namespace <k8s-namespace>

NAME           TYPE           CLUSTER-IP      EXTERNAL-IP     PORT(S)        AGE
hub            ClusterIP      10.51.243.14    <none>          8081/TCP       1m
proxy-api      ClusterIP      10.51.247.198   <none>          8001/TCP       1m
proxy-public   LoadBalancer   10.51.248.230   104.196.41.97   80:31916/TCP   1m
เช่น
kubectl get service --namespace jhub
ถ้าไม่เห็น EXTERNAL-IP เปิดอีก cmd แล้วรัน
minikube tunnel
ถ้าอยากดูรายละเอียด
>kubectl describe service proxy-public --namespace jhub
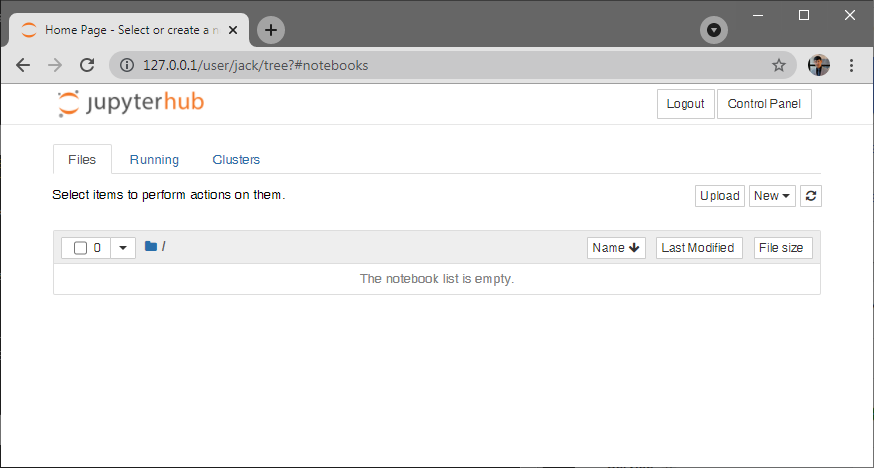
เปิด browser ไปที่ EXTERNAL-IP