
Visual Studio Code (วิชวล สตูดิโอ โค้ด)
- ดาว์นโหลด และติดตั้ง
- Basic Editing
- การเข้าหน้า Settings
- การเปลี่ยน default ตัว Format document
- การปิด format on save
- marketplace
- Python
- Extension
- Jupyter extension
1.ดาว์นโหลด และติดตั้ง
ติดตั้งแบบ Portable Mode – After unzipping the VS Code download, create a data folder within VS Code’s folder:
ติดตั้งแบบ Install โดยดาว์นโหลด Visual Studio Code ได้ที่ https://code.visualstudio.com/
Path ที่ติดตั้ง VS Code (Visual Studio Code on Windows)
C:\Users\{username}\AppData\Local\Programs\Microsoft VS Code
Path ไฟล์ settings.json
in User Preferences (Global)
- Windows %APPDATA%\Code\User\settings.json
- macOS $HOME/Library/Application Support/Code/User/settings.json
- Linux $HOME/.config/Code/User/settings.json
C:\Users\{username}\AppData\Roaming\Code\User\settings.json
in Folder
- .vscode/settings.json
Config Line Breaks (settings.json)
การ config นี้จะมีผลกับไฟล์ใหม่เท่านั้น
For LF
{
    "files.eol": "\n",
}
CRLF
{
    "files.eol": "\r\n",
}
2.Basic Editing
| Keyboard shortcuts | |
|---|---|
| เรียก Command Palate | Ctrl+Shift+P |
| Format Document | Shift+Alt+F |
| Format Selection | Ctrl+K Ctrl+F |
| การ Zoom ทั้ง Editor (ขยาย) | Ctrl+ |
| การ Zoom ทั้ง Editor (ย่อ) | Ctrl- |
การเปิดไฟล์ด้วย Encoding ที่ต้องการ เช่นต้องการเปิดแบบ Windows-874
ที่มุมขวาล่างกด UTF-8

เลือก Reopen with Encoding
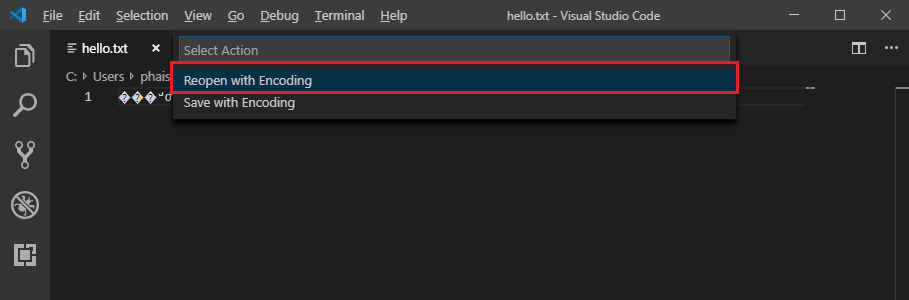
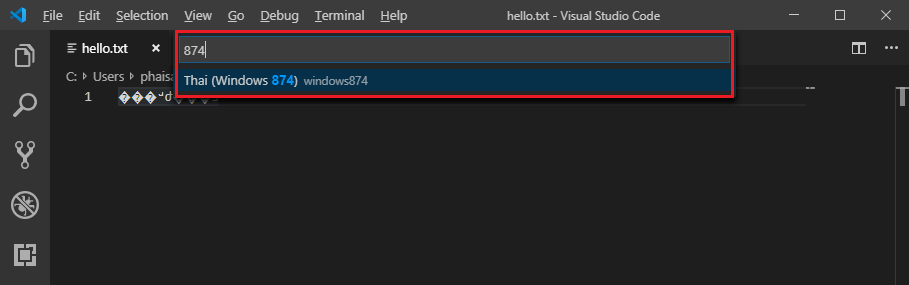
พิมพ์ 874 แล้วเลือก Thai (Windows-874)
การบันทึกไฟล์ด้วย Encoding ที่ต้องการ เช่นต้องการบันทึกเป็น UTF-8
ที่มุมขวาล่างกด Windows-874
เลือก Save with Encoding
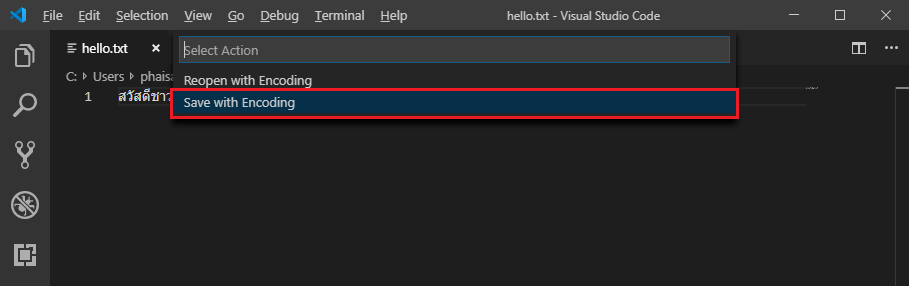
พิมพ์ utf-8 แล้วเลือก UTF-8

การ Format Code
Shift+Alt+F
การเรียก IntelliSense
Ctrl+Space
Fold & Unfold ตำแหน่งที่ cursor อยู่
Ctrl+Shift+[  (Fold)
Ctrl+Shift+]  (Unfold)
Fold & Unfold ทั้งเอกสาร
Ctrl+K Ctrl+0  (Fold All)
Ctrl+K Ctrl+J  (Unfold All)
Code Action
Code Action หรือ Quick Fixes จะช่วยแก้ปัญหาเวลาที่เราไม่ได้ using อ่ะ
เลือกหลอดไฟสีเหลืองที่ทางซ้ายต้นบรรทัด จากนั้นก็เลือกเอาว่าจะแก้ปัญหาอย่างไร
การ Debug ใน VS Code (Get Started with C# and Visual Studio Code)
กำหนด breakpoint ด้วย F9
รันด้วย F5
ดูตัวแปรที่ watch หรือ local โดยเลือกไอคอนรูป bug ทางซ้ายของ VS Code
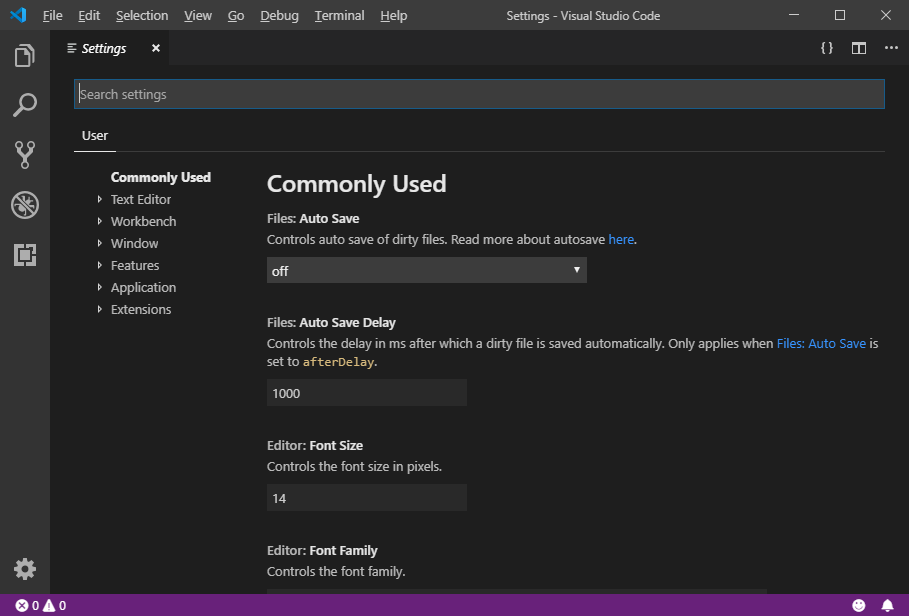
3.การเข้าหน้า Settings
เลือกเมนู File > Preferences > Settings
การ Turn off “matching” highlighting
เข้าหน้า Settings แล้วค้นหา “Match Brackets” แล้วยกเลิกเครื่องหมายถูก

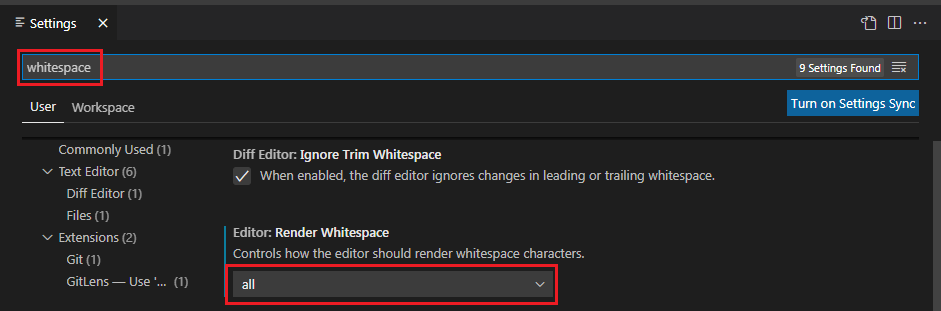
Show whitespace characters in Visual Studio Code เข้า Settings แล้วพิมพ์ค้นหาด้วยคำว่า whitespace แล้วเลือก Render Whitespace เป็น all
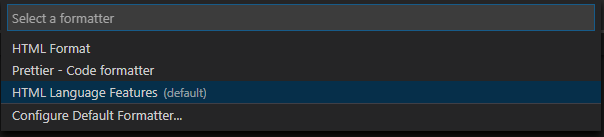
4.การเปลี่ยน default ตัว Format document
เรียก Command Palate (Ctrl+Shift+P)
พิมพ์ Format Document With

เลือก HTML Format หรือเลือกตัวที่ต้องการ
Link
5. การปิด format on save
ctrl + shift + p
type "formatter config"
จะเปิดไฟล์ formatter.json ให้แก้เป็น "onSave": false
{
    "onSave": false,
    "javascript": {
        "indent_size": 4,
        "indent_char": " ",
        "eol": "auto",
        "preserve_newlines": true,
        "break_chained_methods": false,
        "max_preserve_newlines": 0,
        "space_in_paren": false,
        "space_in_empty_paren": false,
        "jslint_happy": false,
        "space_after_anon_function": false,
        "keep_array_indentation": false,
        "space_before_conditional": true,
        "unescape_strings": false,
        "wrap_line_length": 0,
        "e4x": false,
        "end_with_newline": false,
        "comma_first": false,
        "brace_style": "collapse-preserve-inline"
    },
    "css": {
        "indent_size": 4,
        "indentCharacter": " ",
        "indent_char": " ",
        "selector_separator_newline": true,
        "end_with_newline": false,
        "newline_between_rules": true,
        "eol": "\n"
    },
    "html": {
        "indent_inner_html": false,
        "indent_size": 4,
        "indent_char": " ",
        "indent_character": " "
    }
}
เสร็จแล้วให้ปิด VSCode แล้วเปิดใหม่
6.marketplace
- https://marketplace.visualstudio.com/vscode
- https://marketplace.visualstudio.com/items?itemName=vscjava.vscode-java-pack
- https://marketplace.visualstudio.com/items?itemName=redhat.java
7.Python
7.1 Tutorial
- Get Started Tutorial for Python in Visual Studio Code
- Using Python Environments in Visual Studio Code
Select a Python interpreter: Ctrl+Shift+P, start typing the Python: Select Interpreter เช่น
C:\Users\jack\project1\env\Scripts\python.exe
7.2 Linting
Enable linters: Ctrl+Shift+P and select the Python: Select Linter command.
Run linting: Ctrl+Shift+P, then enter and select Python: Run Linting.
8.Extension
- Bracket Pair Colorizer 2 – GitHub – CoenraadS/Bracket-Pair-Colorizer-2: Bracket Colorizer Extension for VSCode
- Git (Git Graph, GitLens)
- Remote – SSH
- Vim
- C# – Visual Studio Marketplace
- Azure Functions – Visual Studio Marketplace
- Theme (Cobalt2 Theme Official, Night Wolf)
- Prettier – How to configure Prettier and VSCode | Better world by better software (glebbahmutov.com)
- Better Comments – Better Comments – Visual Studio Marketplace
- autoDocstring – Python Docstring Generator – Visual Studio Marketplace
- C# Dev Kit
9.Jupyter extension
- Step 1. Install VS Code
- Step 2. Install Anaconda/Miniconda or another Python environment in which you’ve installed the Jupyter package
- Since not working with Python, make sure to have a Jupyter Kernel that corresponds to the language you would like to use installed on your machine.
- Step 3. Install the Jupyter Extension and the Python Extension
- Step 4. Open or create a notebook file by opening the Command Palette (
Ctrl+Shift+P) and selectJupyter: Create New Jupyter Notebook.
- Step 5. Select your kernel by clicking on the kernel picker in the top right of the notebook or by invoking the
Notebook: Select Notebook Kernelcommand and start coding!